

A simple OpenCV program to access your webcam
Continuing our BabyCam series, the next step after Installing OpenCV locally is to write a very simple program to access the webcam and display the stream on screen, here’s where the fun begins!
First things first, we need to decide what programming language to use for such task, being this the Ruby Dude blog I guess the answer is pretty obvious, right? ;) Wrong! Part of being a good software engineer is knowing how to pick the right tools for the job, lets go over the facts:
- The purpose of this code is to interact directly with hardware, the webcam for now, but many other sensors later.
- This application will run in a fairly limited platform, and we can’t afford spending a lot of CPU, Memory or storage on overcomplicated frameworks.
- We’ll be using a native C Computer Vision library for real-time video processing.
As much as I love Ruby, it just doesn’t seem to be the right fit for our project, we want the ability to talk to our hardware directly without sacrifizing precious resourcess, so at least for this layer of the platform we’ll use C++. Don’t worry, later in the project we’ll want to install a web server and show the camera stream online, then we’ll use Ruby!
The code is very well commented, I will first paste it entirely here and then I’ll highlight a couple of things that could potentially require further clarification.
#include <iostream>
#include "opencv/cv.h"
#include "opencv/highgui.h"
using namespace std;

int main()
{
    // Create the webcam window.
    cvNamedWindow( "CAMERA_STREAM", CV_WINDOW_AUTOSIZE );
    // Open the video stream using any connected cam.
    CvCapture* stream = cvCaptureFromCAM( CV_CAP_ANY );

    if ( !stream )
    {
    	cout << "ERROR: The stream is null!\n";
    	return -1;
    }

    IplImage* frame = NULL;

    char keypress;
    bool quit = false;

    while( !quit )
    {
        // Get a frame from the cam
        frame = cvQueryFrame( stream );
        // Draw it to the window
        cvShowImage( "CAMERA_STREAM", frame );
        // Wait 20ms
        keypress = cvWaitKey( 20 );
        // Turn on the exit flag if the user presses escape.
        if ( keypress == 27 ) quit = true;

    }

    // Cleaning up.
    cvReleaseImage( &frame );
    cvDestroyAllWindows();
}OpenCV uses a module called “HighGUI” to quickly display platform-independent user interfaces, from the OpenCV Documentation:
While OpenCV was designed for use in full-scale applications and can be used within functionally rich UI frameworks (such as Qt, WinForms, or Cocoa*) or without any UI at all, sometimes there it is required to try functionality quickly and visualize the results. This is what the HighGUI module has been designed for.
Alright, so very straight forward, the very first step is to create and render a HighGUI window that we’ll use to draw the video stream:
cvNamedWindow( "CAMERA_STREAM", CV_WINDOW_AUTOSIZE );Next, we grab the input stream from the camera:
CvCapture* stream = cvCaptureFromCAM( CV_CAP_ANY );Note that CV_CAP_ANY is a constant provided by OpenCV that will return the first camera available, if you have multiple cameras connected to your computer you might want to check OpenCV documentation for more details.
Once we get a handle of the stream we loop infinitely until the escape key is pressed, each time we’ll grab a snapshot of the stream and present it to the HighGUI window.
// Get a frame from the cam
frame = cvQueryFrame( stream );
// Draw it to the window
cvShowImage( "CAMERA_STREAM", frame );
Alright, let’s try to compile the file:
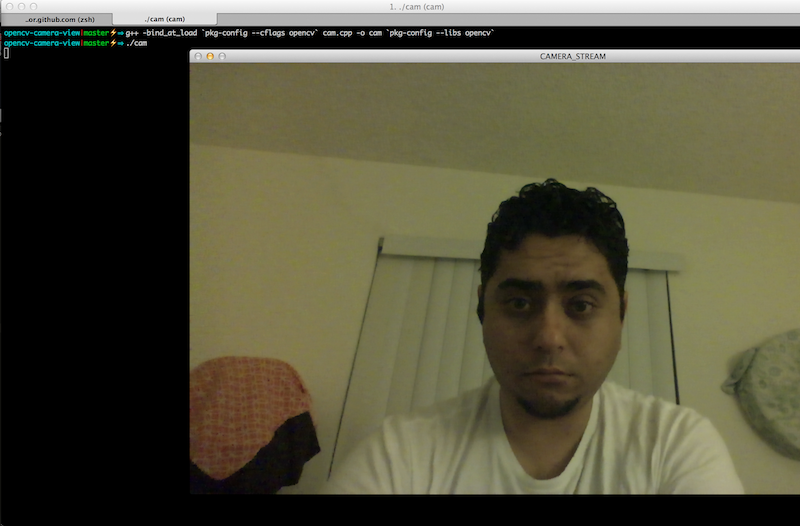
$ g++ -bind_at_load `pkg-config --cflags opencv` cam.cpp -o cam `pkg-config --libs opencv`And then run the binary:
$ ./camVoila! you should be watching your webcam video stream on your screen at this point, if you come across any errors related to missing OpenCV libraries, make sure you follow the Previous Post (And don’t forget to add the installation dirs to the environment variables, as the post describes).
That’s it for now, in the next post we’ll have some fun with face tracking!